GET A GOOD START
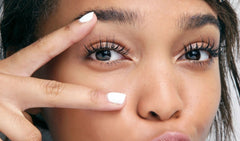
Visualize your brow shape before you start. "The front of the brow should align with the upper bridge of your nose
GIVE YOURSELF GUIDELINES
Fill in your brows before you pluck. This way, you won't overdo it. Using a slanted pencil at a perpendicular angle for the front of the brow—the widest part—turn it sideways at the arch for a thinner line at the end. The arch should be three-quarters of the way back from the nose bridge.
BRUSH UPWARD
After drawing your desired eyebrow shape, use a spoolie brush to coax hairs up for lift and volume.
SEE OPEN SPACES
The bottom portion of the brow is the most crucial area to fill. We hold our tweezers against the front of the brow and inner arch to see what was missing.
CLOSE THE GAP
Using your pencil, adds pigment in the area between the front-end and inner arch. we prefer mostly powder, with a minimal amount of wax. Overly waxy brow pencils go on dark and heavy, and can stick and clump.
RETRACE YOUR STEPS
After you've plucked and trimmed, the penciled-in makeup will likely have faded. Go back and fill in where you need to, then begin work on your other brow.
GO FOR A MIRRORED EFFECT
Repeat the same techniques on brow number two and keep in mind that for a symmetrical look, you want the tops of the arches to be at the same point.
DON'T FORGET TO POWDER
Once you're finished, dust a bit of translucent powder over arches to set the brow pencil. This will help soak up the natural oils on your skin and keep your eyebrows looking freshly groomed.
